


It’s not hard to create a Salesforce dashboard. But sharing it with others? A little less than straightforward. This might require you to update permissions or copy/paste the link to the dashboard folders — which can be time-consuming, expensive, and limited to specific users.
But the good news is that you have lots of other options. In fact, there are five different ways to share a dashboard in Salesforce depending on your needs.
And did we mention there are ways to share dashboards without spending extra integrations or user licenses? 👀
With that, let's look closer at how to share a dashboard in Salesforce so you can pick the option(s) that are right for you.
But first: creating a dashboard in Salesforce
Salesforce dashboards are available on Salesforce Classic and the Lightning Experience.
They’re technically available on the following editions:
- Essentials
- Group (view-only options)
- Professional
- Enterprise
- Performance
- Unlimited
- Developer
However, you won’t have access to the most vital features on anything below the Professional plan (read: essentials and group).
You can use Salesforce dashboards for all sorts of tasks, like identifying trends, checking increases or decreases, or measuring the impact of your team’s activities.
The problem is, they're a little clunky to share.
Let’s take a look at a few different options.
5 ways to share a dashboard in Salesforce
Salesforce only lets you share dashboards by sharing the accompanying folder they’re in. They also require you to purchase user licenses, which can get expensive fast depending on the number of people on your team.
But there are alternative ways to share your dashboards depending on who needs to see your data. You can also keep them secure behind passwords and two-factor authentication (2FA) for worry-free sharing.
With that out of the way, here are five different ways to share a dashboard in Salesforce.
1. View together inside of Salesforce

The first (and most obvious) route to take is changing your visibility settings so coworkers can collaborate with you inside of Salesforce.
There are no additional setup or third-party tools required. However, you still have to purchase Salesforce licenses for everyone who needs access to the data. Plus, your dashboards can’t be viewed outside of Salesforce, which could be a problem if you want to share them with others.
Here’s how to view Salesforce dashboards from inside your Salesforce instance:
1. Enable user permissions.
You need to turn on two things: View Dashboards in Public Folders, and Create and Customize Dashboards.
2. Set your dashboard visibility settings.
This time, you have three options:
- Private: Only the person who created the dashboard can see it (you don’t want this one)
- Public read-only: People can read your dashboard, but not edit any information
- Public read/write: People can read and edit the information in your dashboard
Keep in mind these visibility settings affect the folder, not just the dashboard. If you want to share your dashboards with other members of your team, you’ll need to update permissions for your dashboard folder (or create a separate folder for individual dashboards if you don’t want to share too much information).
3. Share your dashboard with appropriate team members.

In the Dashboards tab, select the dropdown menu from the dashboard you wish to share. Then tap Share.
Next, choose the group who should have access to the dashboard folder. You can sort your access levels by View, Edit, or Manage, or select individual users by typing their name into the empty field.

When you’re finished, press Done. Your dashboards are now shared.
Is this too frustrating and cumbersome for your business’s use case? Keep reading to explore another use case.
2. Create a screenshot or image of your Salesforce dashboards

Salesforce’s built-in method of sharing dashboards requires you to share dashboards with members of your internal team. This means it doesn’t make sense for sharing data externally (unless you feel like purchasing another user license).
One possible workaround is taking a screenshot and sending the details along via email or Slack. You could also configure a live stream of your dashboard, or record a short video that lets them see the basics at a glance.
The drawbacks of this method? It’s a fully manual process. There’s no way to automate this process or capture dashboards at scale.
It also won’t update your images with real-time information, which means you’ll have to manually capture footage at least once per day or per week.
If you don’t mind these issues, here are a few steps to get started.
1. Decide how you wish to capture your dashboard.
You have a few options:
- A screenshot, which is best for static information.
- A video, which is best for scrolling or moving about the dash board.
- A live stream, which is free to set up with tools like YouTube, but fairly complex and clunky in most use cases.
2. Pick the right tools for the job.
If you’re going with a screenshot, you can use built-in tools like function + prt sc on your computer. You could also download an extension to take a screenshot of the page or a specific part of the dashboard.
For video, you could use tools like Zoom or Loom. This allows you to capture larger pieces of information without needing to stitch screenshots together.
Your final option is using a tool like YouTube to live stream your dashboard to a private live stream. This is relatively clunky and difficult to set up. Plus, it’s a little less secure than other options on this list (skip to section five if you’re interested.
3. Capture your footage and upload to the proper location.
Images and screenshots can be sent via email, Slack, Google Drive, or any other place you work.
You can send Loom videos directly from your Loom library, or upload Zoom footage to the cloud so other users can access it.
Your live stream footage can technically run for as long as you want it — but it can only archive videos up to 12 hours long. This means you’ll have to stop and restart if you want a record of your footage, or at least come to terms with losing recorded history.
3. Post your Salesforce dashboard in Slack

Want to share dashboards outside of Salesforce? You can use the ‘Post to Slack’ feature to push snapshots into individual channels. This creates a button coworkers can press to generate a secure .png — which means people outside of your Slack channel won’t have access to the data unless you share the generated screenshot.
Keep in mind that 'Post to Slack' only works in channels that aren’t shared across multiple workspaces. It’s also only available with Salesforce CRM Analytics, so be prepared to pay for a separate add-on.
You’ll also need a Professional bundle on the Lightning edition (plus a separate Slack subscription) in order to set up the workflow effectively. So if you want to share more than just CRM data, or if you don’t want to spend extra on Slack plus a pricier bundle, you might want to consider a more cost effective route.
If these limitations don’t bother you, here’s how to automatically push a Salesforce dashboard to Slack:
1. If you haven’t already, purchase the CRM Analytics app.
This starts at $140 per user per month (billed annually) for basic access, and goes up to $165 per user per month (billed annually) for built-in AI with reports. If you need Industry, Service, or Revenue intelligence, prepare to pay another $250 per user per month. Keep in mind you can sign up for a 30-day free trial if you just want to test the integration with your team.
2. Accept the terms of service to complete the setup process for CRM Analytics for Slack.
This might take a minute if you need to add yourself to all CRM Analytics-related permissions. If they’re not set up correctly, installation will fail.
Here’s a list of mission-critical permissions you need to enable:
- Connect Salesforce with Slack
- Subscribe to CRM Analytics Assets
- Add Recipients to CRM Analytics Notifications

If you’re not sure what is enabled or disabled, check your admin dashboard as a precautionary measure. You can also use Global Search to check for specific Slack requirements one by one.
3. Complete the setup process in both Slack.
Now that you’ve enabled CRM Analytics in Salesforce, you need to complete the installation process in Slack.
Under Apps, search for and select CRM Analytics. In the Home tab, click Connect your account and wait for the browser window to pop up. Once that happens, click Connect.

Then, follow the on-screen instructions:
- Enter your Salesforce username and password
- Tap Log In or Use Custom Domain (depending on your business setup)
- Choose the workspace that should house your dashboards, then tap Allow
- Check the box that reads I agree to allow Slack to access my Salesforce account, then tap Allow
Voila — you can now access your Salesforce dashboards in Slack.
But keep in mind this method requires Salesforce licenses for team members to view your posted content in Slack. Plus, there’s no way to schedule Salesforce dashboards to appear in Slack — which means after all that setup, you’re still stuck with manual methods.
You can get around this by partnering with a third-party app, but keep in mind this will be an additional expense.
Not a method that makes sense for you? Skip to the next section below.
4. Share Salesforce dashboards on office TV screens

Not every organization has people sitting behind a desk. And yet, you still need to deliver real-time information like packing orders or patient admittance. They probably won’t have time to log into Salesforce or Slack — and if you have inconsistent viewers, it might get expensive to add each one as a user.
The good news is that you can create office TV dashboards that display information in any location with a WiFi connection. That way, you can bring Salesforce dashboards to your conference room TVs, break rooms, lobbies, and even tight or awkward spaces.
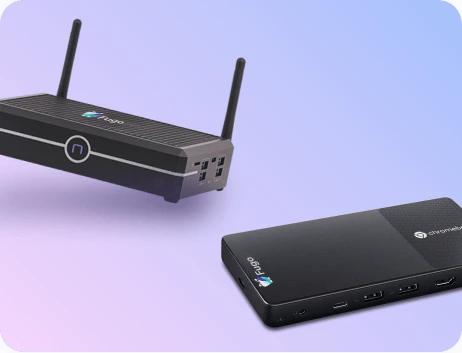
Of course, this method does require a little extra hardware, including a TV screen and (sometimes) a media player. But if you use a tool like Fugo.ai, you could potentially get started for free.
Here’s the easiest way to display Salesforce on TV screens:
1. If you haven’t already, sign up for a Fugo account. You’ll have access to a 14-day free trial (and we never take credit card info to auto-bill your account).
1. Pair your screen to Fugo.
You can do this with a media player like the Fugo NUC or Fugo Flash, or cast your PC directly to your screen by visiting player.fugo.ai. To get started, you first, pair your screen by downloading the Fugo app (we have a comprehensive list of every OS this is for). Then, follow the instructions on screen and visit your Fugo dashboard to enter the four-digit code and complete the pairing process.
This allows you to connect with any smart TV, professional display, or digital signage player in your network. In other words, you can put your TV dashboards wherever your team gets work done.
2. Connect your Salesforce dashboard to your Fugo account.
All you have to do is follow the prompts in the step recorder to teach Fugo how to access your Salesforce dashboard URL. You don’t need to give it public access — our tool will use your credentials to screenshot what’s inside.
We recommend:
- Using a ‘least privileged’ or ‘view-only’ account so you can keep your data as secure as possible
- Setting your Salesforce password expiration policy to ‘never expires’ (so you don’t have to worry about future hiccups)
Next, it’s time for logging in with SSO for an additional layer of security — we typically recommend Google and Microsoft for 2FA. Get your Secret Key and enter it into Salesforce, then again in Fugo when we prompt you.
Now, click Dashboards → Create Dashboard to launch a New Dashboard window.
Tap Start with a link and enter your Salesforce dashboard URL in the editable field. Then, click Open Dashboard.
3. Push your Salesforce dashboard to your screen.
Now that Fugo has access to your dashboard, you can screenshot it at set intervals and automatically update the information on your screen(s).
You can capture your dashboard information in one of three ways:
- Capturing the whole screen
- Using the Eraser tool to remove unwanted elements
- Using the Element Screenshot tool to only capture specific parts of your dashboard
From there, you can Save and Publish your newly created dashboard, or optimize it further with our Design Studio tools.
💡 Get the detailed guide: How to Share a Salesforce Dashboard to Your Digital Signage Screen With Fugo's Dashboard Recorder
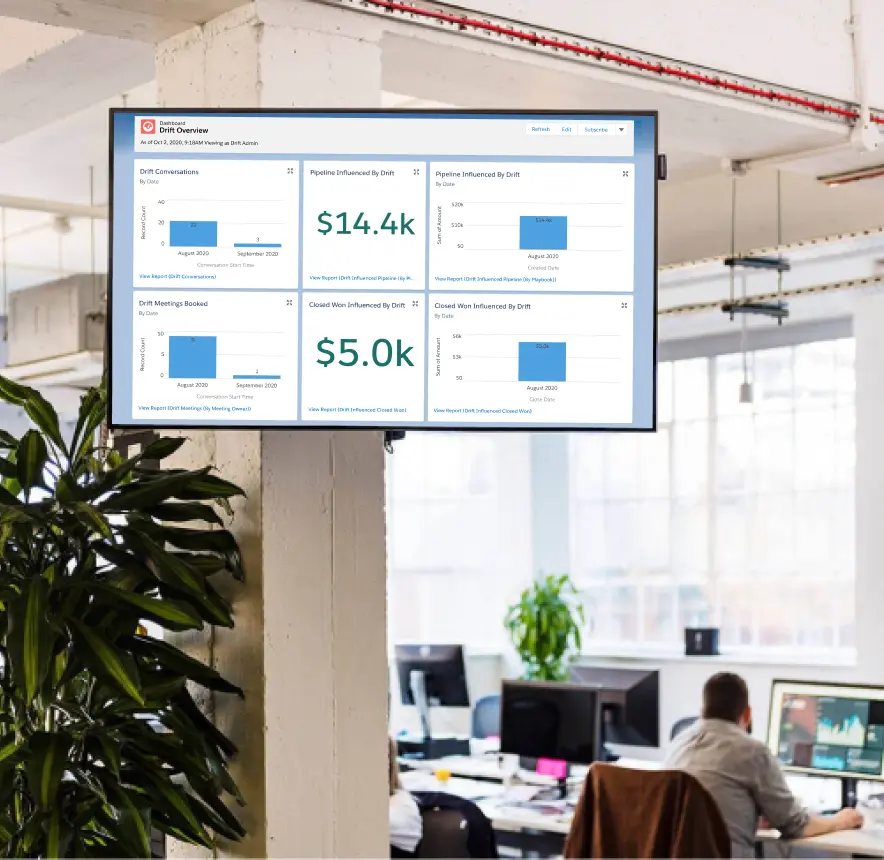
5. Embed Salesforce dashboards in company TV channels
And last but not least, the easiest method — sharing your Salesforce dashboards by creating a digital TV channel. This means you can embed your content into company intranets like Confluence channels, Notion boards, and even your internal websites. Don’t use any of these platforms? You can even view dashboards from a secure browser tab.
With embeddable channels for your Salesforce dashboard(s), you can:
- Add different reports and dashboards to the same playlist
- Schedule and cycle information based on pre-set conditions (like ‘Weekends’ or ‘8 AM to 4 PM’)
- Share direct links to your company channel or embed your virtual TV screen in places your team members access most
- Store data behind authentication so you can rest easy knowing it’s in good hands
The best part? You only need 15 to 20 minutes to get started.
Here’s the easiest way to share your Salesforce dashboards with company TV channels:
1. Sign up for a Fugo.ai account (free for 14 days). We don’t take your credit card info during signup, so don’t worry about being charged if you’re just testing. 😉
2. In your Fugo admin dashboard, click Create Channel. Once you give it a name, tap Create.
3. Click Add Playlist and choose the content you wish to add. If you’ve already connected your Salesforce dashboard, you should be able to select it from the list. Otherwise, we’ll prompt you in-app with a step-by-step process to help you integrate with your Salesforce account.
4. Share your completed playlist with your team members! You have three options:
- Tap Copy and share the URL with team members (or contact Fugo to make them password protected first)
- Tap Share to send your link through common communication channels (LinkedIn, X, email, Facebook, etc).
- Copy the embeddable code at the bottom of the popup to integrate your Salesforce dashboard onto your website, Notion board, Confluence account, and more.
Keep in mind this method works with more than just Salesforce dashboards. You can also connect with Power BI dashboards, share Tableau dashboards, and more. This makes it easy to share information with your team without expensive user licenses or confusing permissions.
💡 Get the detailed guide: How To Share a Company TV Channel With Fugo
Start sharing your Salesforce dashboards with Fugo today

Salesforce is an amazing tool — but not necessarily for sharing information. Manually sharing a link to your Salesforce dashboard folders isn't ideal for busy managers and team leaders. Plus, paying for expensive user licenses could blow your budget out of the water.
But what is ideal is using the power of office TV dashboards to share your data without compromising your data security. No more expensive user licenses or funky workarounds with expensive plans — just connecting your dashboards, pushing them to your screens, or sharing a link with the right people on your team.
With Fugo, you can easily get started connecting your dashboards with 20 minutes or less. We offer detailed setup guides and in-app prompts to help configure your dashboards even if you don’t have much prior experience.
And did we mention getting started is free? 👀
Sign up today for a 14-day free trial and start sharing dashboards from Salesforce in minutes.

